This article talks about the basic commands needed to manage Ubuntu permissions.
For more on this subject, please refer to the SOC Table of Contents.
We can also use the Shell to control the permissions of managing files, mainly from using chmod and chwon.
Changing permissions with chmod
The chmod command changes the permissions regarding files and folders. Permissions can be expressed using either the corresponding letter or number. The formatting is as follows:
chmod [option] [file name / directory]
The main options are as follows:
-f Doesn’t show errors.
-R Recursively processes all of the files under the specified directory.
-v Show the entire process.
-c Same as “-v”, but only displays the change.
We will see how chmod works in an example. First, we create a file titled “test” in the user’s root directory, and then look at its default permissions.
We can see that the default permissions are “-rw-rw-r–”, and we will now change it to “rwxrw-rw-”. If we refer to the above table, we can see that the corresponding number is 766, as 7 corresponds to “rwx”, and 6 corresponds to “rw-”. The command line would look like the following.

We can thus see that we successfully changed the permissions.
We will now do the same, but with a new file named “lettertest” and using its letters instead of its numbers.

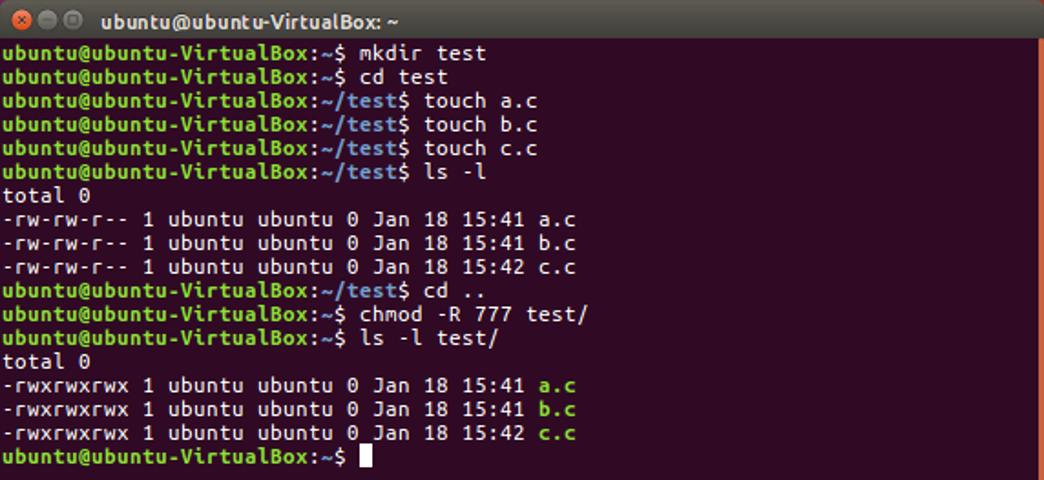
Now that we know how to change the permissions of files, we will move on to changing the permissions of folders. First, we will create a new folder named “test”, and then we will create three files within, which would be a.c, b.c, and c.c respectively.
Note that because we are changing all of the file permissions from “rw-rw-r–” to “rwxrwxrwx”, it corresponds to the number 777. Thus, we can use the following code.
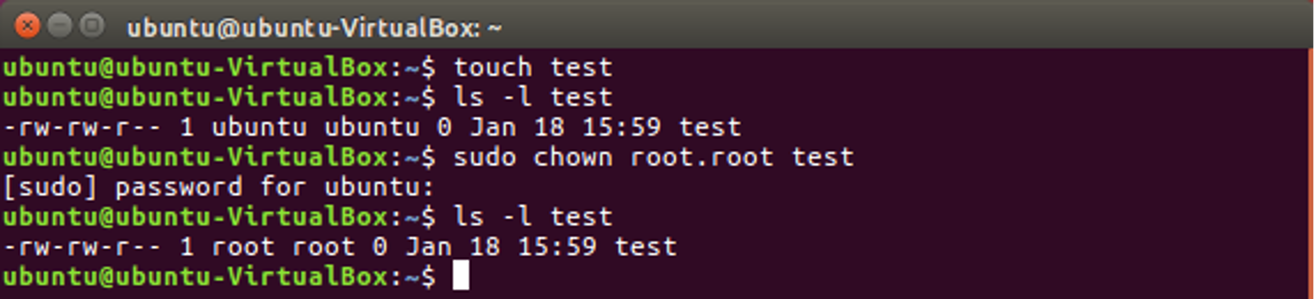
Changing the owner of a file using chown
We can use the chown command to change the owner user as well as user group. The formatting is as follows:
chown [option] [username.<user group>] [file name / directory]
Where [username.<user group>] represents the username and user group that you want to change to. Make sure the username and the user group are separated using a period. Keep in mind that you can omit either the username or the user group. The main options are the same as chmod, but they will be listed here again:
-f Doesn’t show errors.
-R Recursively processes all of the files under the specified directory.
-v Show the entire process.
-c Same as “-v”, but only displays the change.
As an example, we will be creating a file named “test” under the user’s root directory.
We can see that the original owner of the file is our default ubuntu user, but we successfully managed to change it to root as we don’t need to enter the password anymore.