While editing a python program, editors enjoy the luxury of being able to edit and run code on applications that support numerous different features. Rather than editing text on a blank document, programmers use IDEs, or Integrated Development Environments. IDEs always include code editors, the necessary build automation tools, and debuggers. Some also contain compilers (or interpreters, in our case), as well as better Graphical User Interfaces.
This article will teach you how to install Python (IDLE), PyCharm, and Visual Studio Code.
*The rest of this tutorial will be focused on the PyCharm IDE. Please install PyCharm should you continue with the tutorial.
How to install Python and IDLE
The first thing any programmer needs to begin programming is Python, obviously. The Python installation also comes with IDLE, python’s native IDE. It is very simplistic, which makes it unappealing to the vast majority of Python Programmers. For this reason, we will also be installing PyCharm or Visual Studio Code as well as Python.
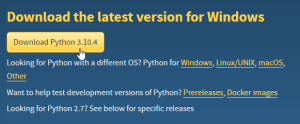
Step 1) Download the newest version of Python from their official website, https://www.python.org/downloads/. This tutorial will be downloading Python 3.10.4, although other versions are also available.
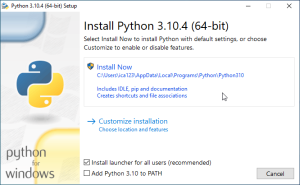
Step 2) Once the download is complete, open the new .exe file that should be in your Downloads folder. Click the “Install Now” button.
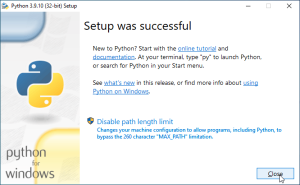
Step 3) Once you see this window, the installation was successful and you may now close this window.
How to install PyCharm
PyCharm is a cross-platform code editor developed by JetBrains. PyCharm is a good option for beginner and senior python programmers alike, due to its efficient and complete tools.
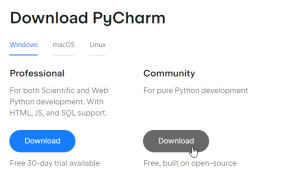
Step 1) Visit the PyCharm website at https://www.jetbrains.com/pycharm/download to download the IDE. Click on the “Download” link under the “Community” section.
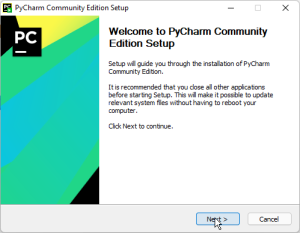
Step 2) Once the download is complete, run the executable to install PyCharm. This will open the installation wizard. Click “Next”.
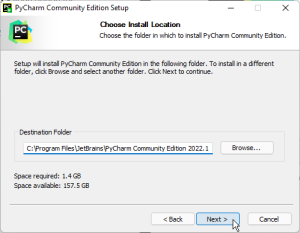
Step 3) On the next window, you may change the installation path. However, the default installation path should be perfectly fine.
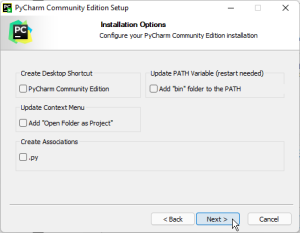
Step 4) On the next window, you can create a desktop shortcut. Once configured to your liking, click “Next”.
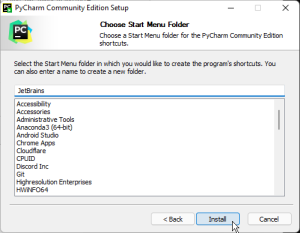
Step 5) Keep the selected JetBrains Start Menu folder and click “Install”.
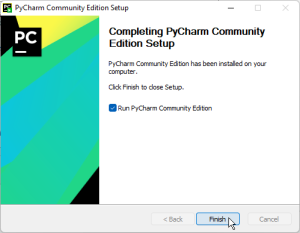
Step 6) Once the installation is complete, you can click “Finish” to exit the installation wizard. If you want to open it after installation (which we will be doing), tick the checkbox before finishing the installation.
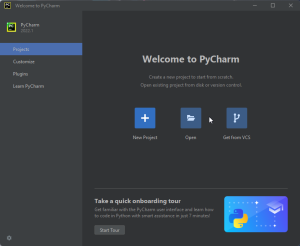
Step 7) Once PyCharm opens, you should be greeted by the following window:
How to install Visual Studio Code (VSCode)
Visual Studio Code (commonly shortened to “VSCode”) is a widely popular IDE developed by Microsoft. Its ability to edit a vast majority of popular languages, its modern GUI, and its open extensions marketplace makes it very appealing to all programmers alike, no matter the task.
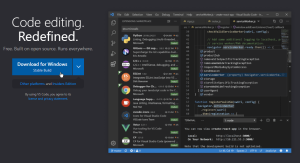
Step 1) Visit the VSCode website at https://code.visualstudio.com to download the IDE. Click the “Download for Windows” button to begin your download.
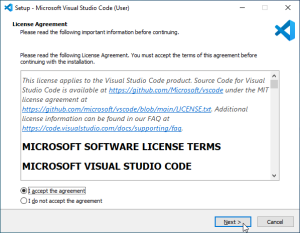
Step 2) Once the download is complete, run the executable to install VSCode. This will open the setup wizard. Check “I accept the agreement” to accept the user agreement, and then click “Next”.
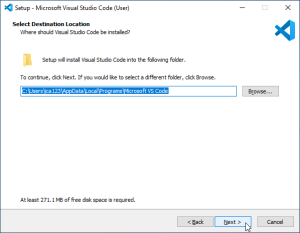
Step 3) On the next window, you may change the installation path. However, the default installation path should be perfectly fine.
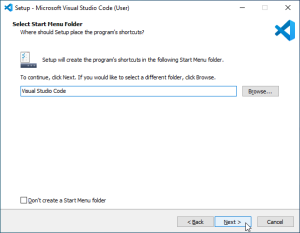
Step 4) Keep the selected Visual Studio Code Start Menu folder and click “Next”.
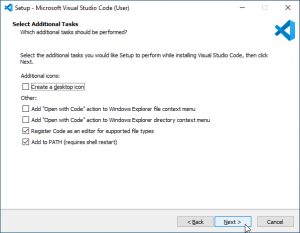
Step 5) On the next window, you can create a desktop shortcut. Once configured to your liking, click “Install”.
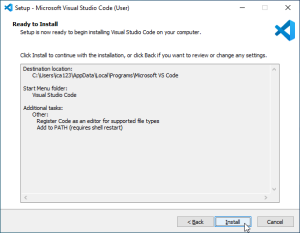
Step 6) The following window is the final installation confirmation. If there are no mistakes, click “Install”. Otherwise, this is the final chance before installation to change any settings.
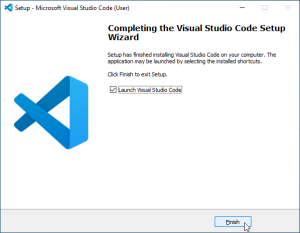
Step 7) Once installation is complete, you can click “Finish” to exit the installation wizard. If you want to open it after installation, tick the checkbox before finishing the installation.
Step 8) Once VSCode opens, you should be greeted by the following window: