This article briefly introduces U-Boot and how to use it.
For related subjects, please refer to the SOC Table of Contents.
*In order to follow along to this tutorial, you will be required to have Ubuntu 16.04.01 already installed on your Virtual Machine using Oracle’s VirtualBox. Because this tutorial is geared towards Ubuntu 16.04.01, using other versions may have differences between the execution of commands. You will also need to have your development board connection already set up, along with your TFTP server.
Similar to how Windows systems have BIOS settings that can be accessed before the system boots up, Linux makes use of its very own Bootloaders. Because we deal with embedded development, we will be using the most widely used U-Boot, which stands for Universal Boot Loader.
When your development board starts up, make sure you stop the autoboot process by pressing any key within 4 seconds. Afterwards, the system should go into U-Boot commands as shown by the zynq> in the command line.
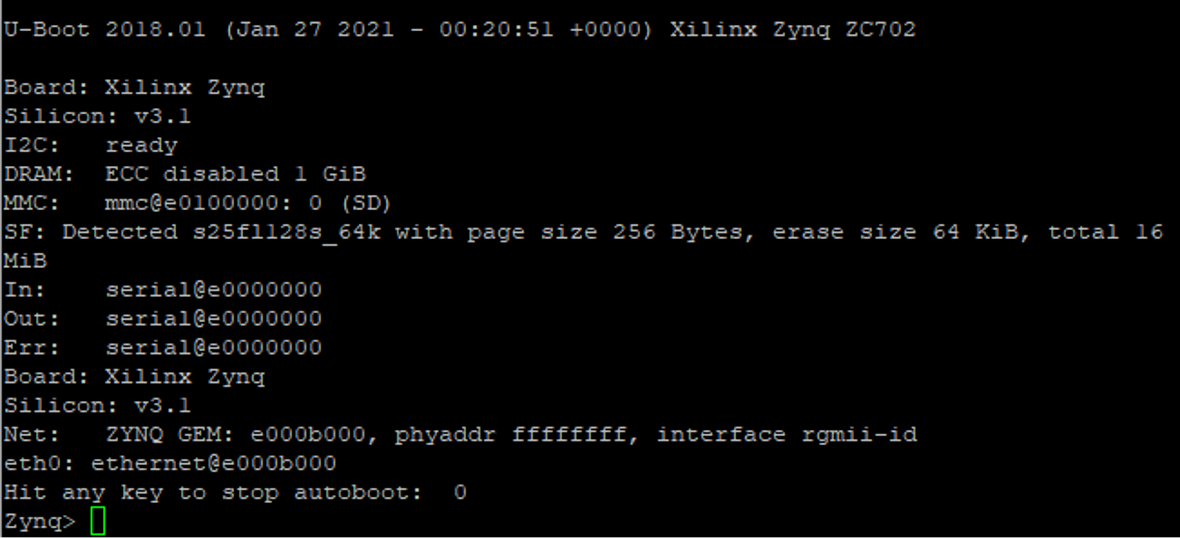
Note the long list of information displayed prior to the stop autoboot prompt.
The U-Boot version is displayed at the very top, followed by the details regarding the development board.
Below, we can see that DRAM (RAM) is set to 1 gigabyte.
MMC refers to the MMC/SD cards that are connected. As we can see, we have one card connected.
SF displays the detection of QSPI –s25f1128s, with the size of 16MB.
The next few lines display the terminals for standard input, output, and error. They all use serial ports as their terminals. serial@e0000000 corresponds to the USB port on the development board.
Finally, we can see the network information below that with Net and eth0.